October 10, 2025
How to paint a night scene in watercolor with titanium white
To paint a night scene in watercolor, I use one color that changed the way I paint: titanium white. I apply it in 3 ways: on paper that is still damp so the pigment spreads, with my finger on dry paper for broken edges, or with a brush on dry paper for hard edges and full control. And I avoid 2 mistakes: using a color that isn't opaque, and not putting down enough pigment.
Why titanium white changes everything for night landscapes
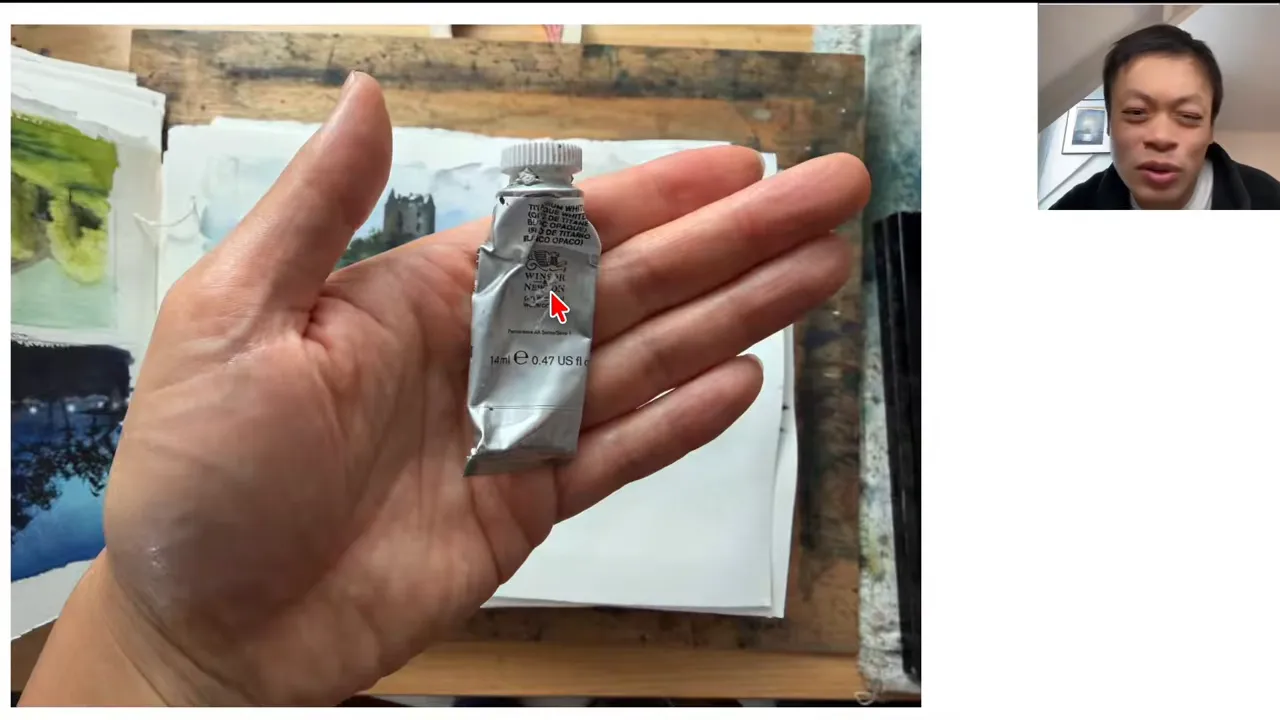
For a long time, I didn't dare paint night scenes. They scared me too much, and I even thought they just weren't possible in watercolor. I was set on keeping the white of the paper: I'd spend a quarter of an hour, half an hour, 1 hour on a night landscape, saving the whites and trying not to touch them. And as soon as I lost that white, it was over: once you lose the white of the paper, there's no going back. What a struggle, what a headache.
When I discovered titanium white, I realized I didn't need to save the whites anymore. If you do, it makes things easier, but it's no longer a must. Above all, it lets me put the pigment exactly where I want it. When you save your whites, you're stuck with wherever you saved them: a little too low, in the wrong spot, and you're in trouble. With titanium white, I decide on the spot where the lights go.
I use Winsor & Newton, but the brand doesn't matter much: it's a fairly common color across manufacturers. It's an opaque color. But in watercolor, opaque colors are never truly opaque: there's water involved, so there's always some transparency.
Technique 1: drop titanium white onto damp paper
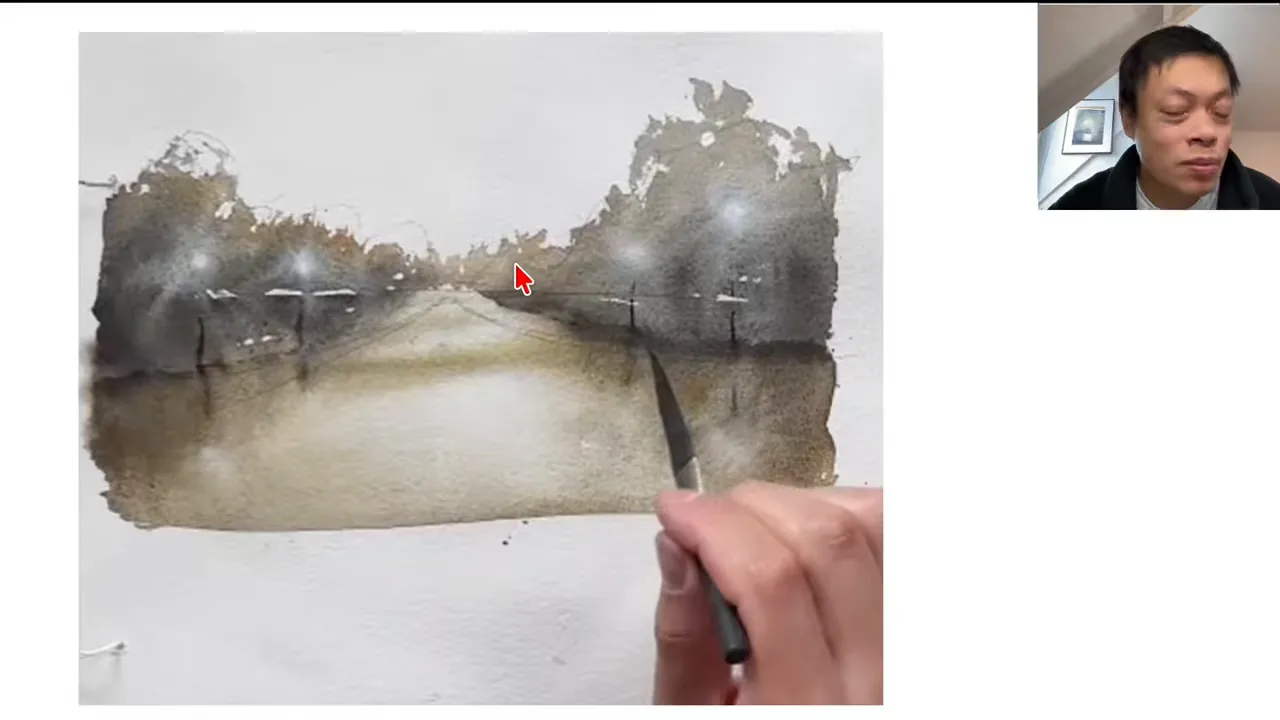
This is the technique I use for trees and streetlights.
- I first paint the trees with palette gray, the color left over on my palette.
- I wait until the trees are slightly damp: not wet, not completely dry.
- I drop in the titanium white while the paper is still damp.
The pigment then spreads into the trees and creates a halo. Where you put the pigment down, it's whitest, and as you move away, the pigment drifts. Some particles are lazier than others: some travel a long way, others not so far. That's what creates the halo.
Getting the amount right is a fine balance. Your brush shouldn't be too wet, or you'll get what I call the discharge effect: all the pigment in the brush unloads onto the paper at once and floods your tree. The goal is to contain that spreading without holding it back too much. With the right amount of pigment, I don't even need to overwork it or go back over it 10,000 times: I just let the pigment spread.
I discovered this effect during a live session with my students. I'd told them I wasn't sure about the result, and that if it flopped, no big deal. And it was gorgeous. That's a real lesson: if you're in an environment that tells you exactly what to do and how, you stop yourself from exploring the treasures of watercolor, which are sometimes the biggest thing you learn in a session. Give yourself room to explore: sometimes nothing will come of it, sometimes you'll get beautiful results.
Technique 2: the finger technique on dry paper
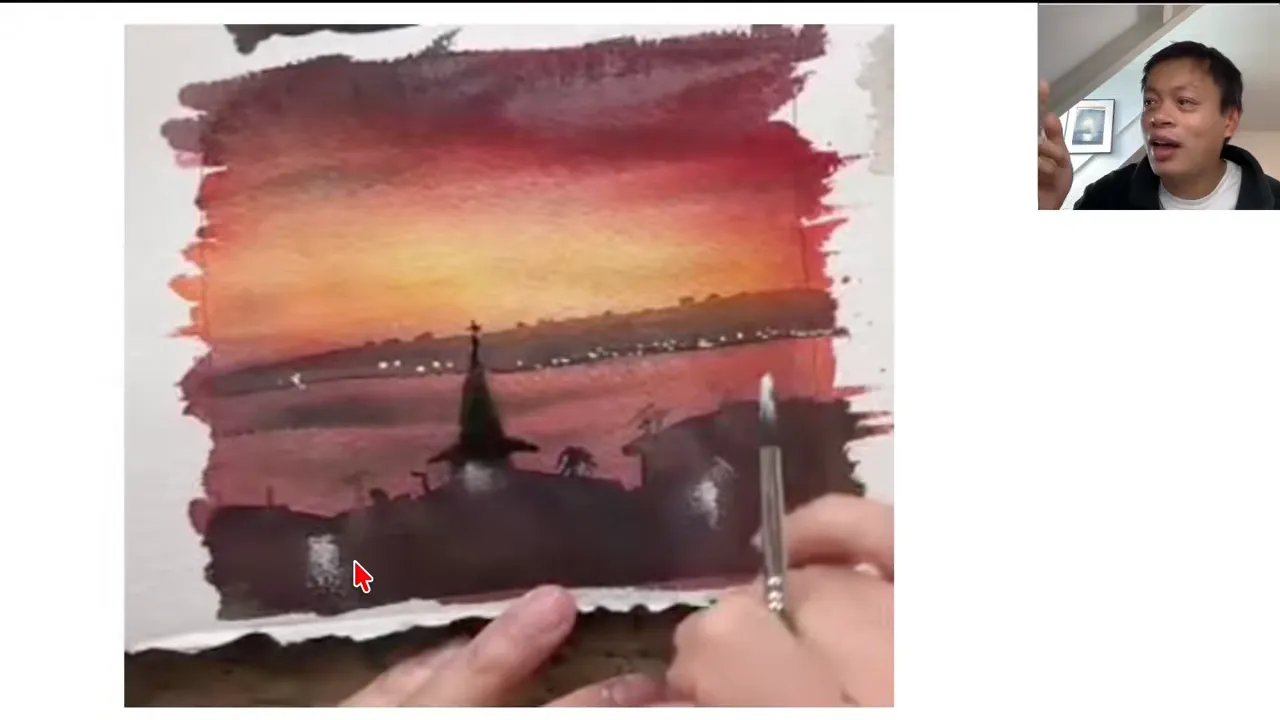
This is a super light, super spontaneous technique. On a landscape I painted with one of my students, the buildings in the foreground formed a fairly dark area, creating what I call the big mass effect: a mass that takes up a lot of space in the painting and that I wanted to break up or soften. The paper was dry, so I couldn't use technique 1 anymore.
Here's what I did:
- I put down some white watercolor.
- I ran my middle finger over it in one quick motion. Any finger will do.
This creates edges I'd call broken, crumbly. It looks like light escaping into the darkness, because light isn't pure white right up until it switches to black. So you can create a halo on dry paper too.
This technique gives you more control than technique 1, since on dry paper the pigment can't spread. You decide the direction, which is ideal for directional lights, like a spotlight shining downward. In 1 or 2 seconds, you've created the glow.
It works best on rough paper, but also very well on cold press. I only work on 100% cotton paper. It might work on cellulose paper, but I haven't tested it.
Technique 3: the brush on dry paper for hard edges
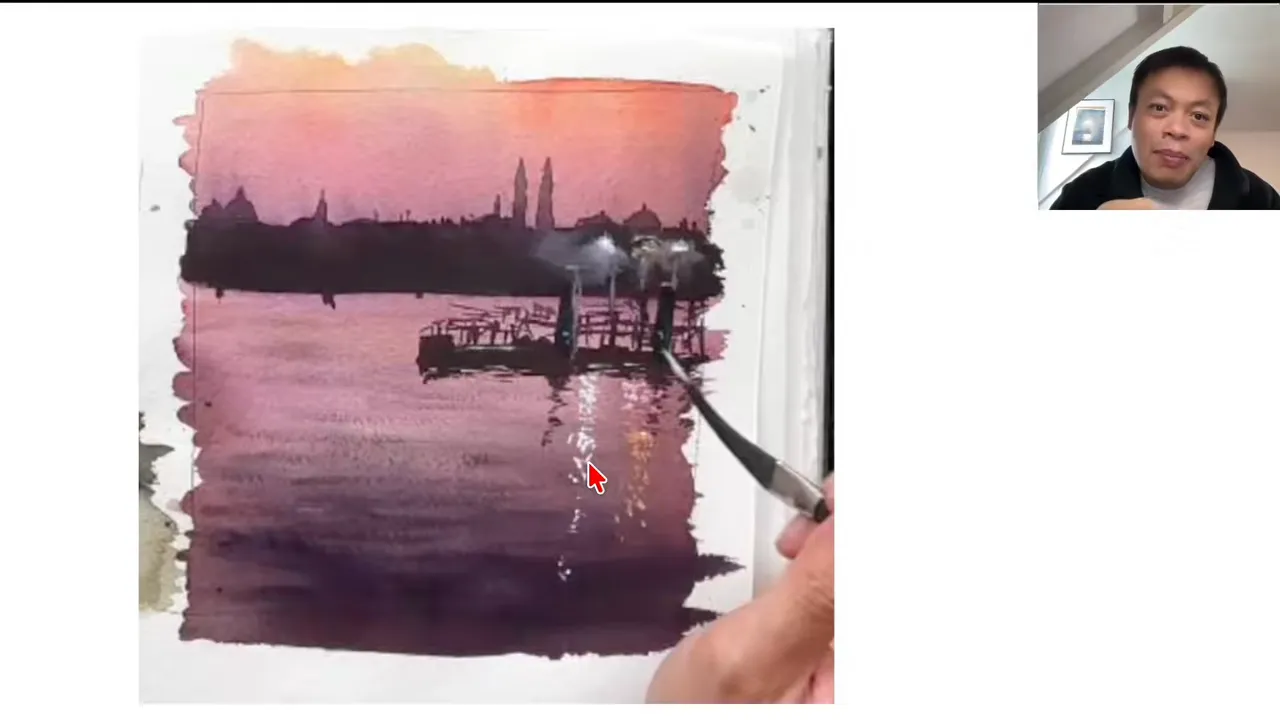
On a Venice scene I painted with my students, I painted the reflections of a fairly white, fairly cool light on the water, straight onto dry paper with a brush. This time the edges are hard, since I'm not rubbing with my finger. The pigment doesn't scatter randomly: I'm in 100% control of where it goes. This is the technique to use when you don't want the pigment drifting left or right.
You can also mix titanium white with a color. I used orange to tone down the white and give a more orange, yellow, red reflection. It depends on your subject and on what you want to create.
This technique also works for a city lit up in the distance: small touches of pigment with the brush create those little points of light you glimpse in a night landscape.
Which mistakes to avoid in a night watercolor
Mistake 1: using a color that isn't opaque. For years, I used Chinese white. The little square on the tube that shows opacity tells you it's not an opaque color. Chinese white didn't capture the night atmosphere at all, or those very white, glowing points. Instead it gave a misty, veiled look, it slightly whitened the colors, and that was it. That's why I was stuck on night scenes for so long. With titanium white, it was night and day: titanium white for night, Chinese white for day. Don't use transparent colors, use opaque ones, which will soften anyway.
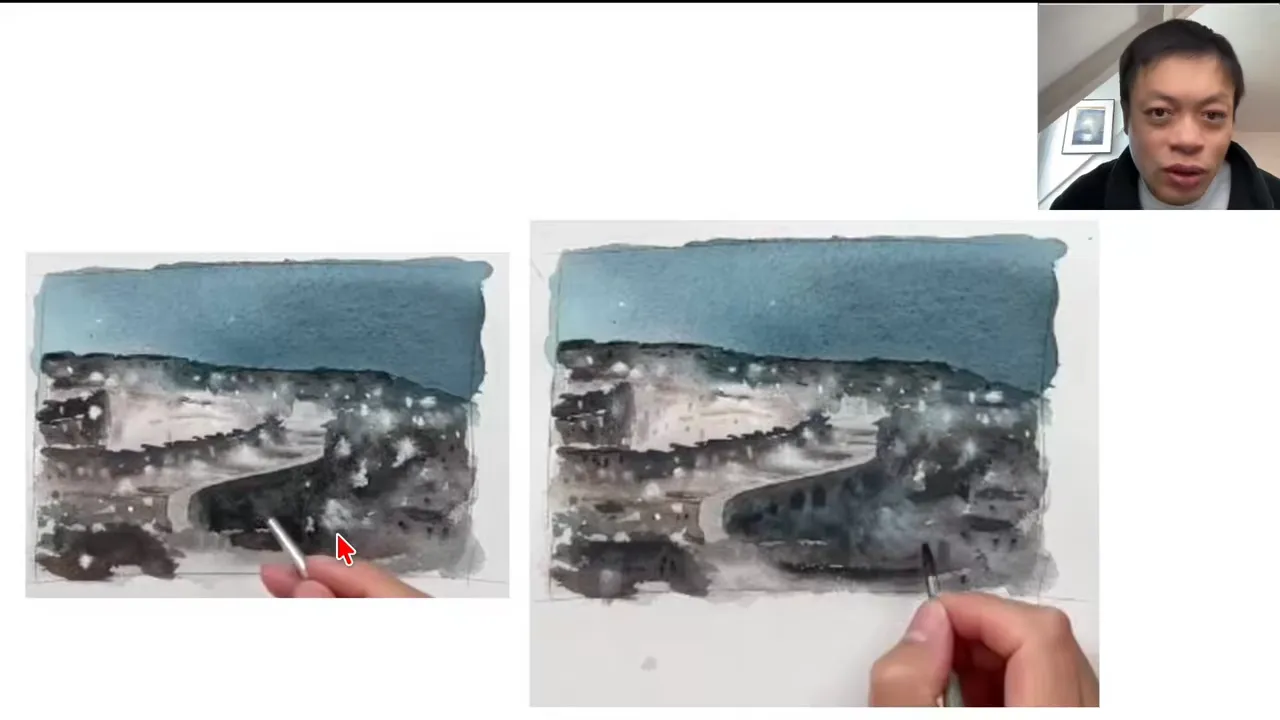
Mistake 2: not putting down enough pigment. On a village at night, painted from a student's photo, I dropped titanium white into the damp paper. Once the paper was dry, it had faded a lot, even though it's an opaque color. Don't hesitate to use plenty, and add more once the paper is dry if you need to, especially with technique 1. If you want a softer, more diffused effect, though, this fading can work very well.
FAQ
Is titanium white gouache?
No. It's classified as a watercolor. I had tried gouache before, but I found it didn't spread as nicely as titanium white.
Does titanium white stay opaque once dry?
Not completely. With water, there's always some transparency, and when you drop it into damp paper it can fade a lot as it dries. That's why it's worth using plenty.
Why doesn't Chinese white work for night scenes?
It's not an opaque color. It gives a misty, veiled look that slightly whitens the colors, without creating the bright, glowing lights of a night landscape.
If you want to finally create on your own, with a proven system instead of copying tutorials, this is exactly what you'll find here 👇
Discover The Loose Watercolor System